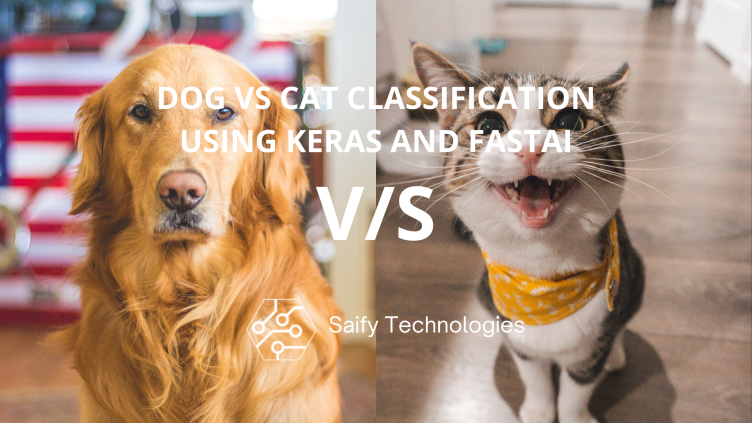
Deep learning is highly used to classify input . It means deep learning model takes input and accurately predict its class that in which class that input is in. Here we will input an image of dog or cat in model and model the has task to successfully classify its type whether it is dog or cat . This example is the hello world of deep learning. It is an easy example here, we be using high level APIs of tensorflow which is KERA and PYTORCH fastai. This are two different frameworks. we will model in each one of them.
As you see above both use different working flow to generate model. In Keras we need to first compile our model Loss function, Optimizer, Metrics and Architecture. Then in Fit function we have to introduce data in it .In FASTAI We first need to make data bunch using FASTAI awsome data block API. In FASTAI image data bunch does all image prepossessing for us and create databunch for us. Don't get scared after hearing all this big big words. This all process are really simple which we will see in this blog. In FASTAI after getting databunch we pass all hyper parameters to learner so that learner will learn learning rate from it. In learner we will pass loss function which sometimes called Criterion so don't get confuse by different names. We also pass Metrics, Architecture along with databunch to learner. Then from learner we will be able to find out suitable learning rate. Then we pass learning rate which was found with epochs to start training in FASTAI.
To develop any application in Fastai we need three things perfectly which is
1) DATA
2) ARCHITECTURE
3) LOSS FUNCTION (CRITERION)
In this example also we will first figure this three component and then compile them to get our required output.
DATA
Here we will download our data from Kaggle which contain 25000 images of dog and cat which is labelled by folders means all dog. Photos is in dog folder and all cat folder is in cat folder. We will get some around 10000 images in test set. We will use 23000 images to train our model and 2000 images to validate our model after each epoch to see our model performance. Then we will use our test set to check/predict how our model is behaving. W will also prprocess our images because 25000 images are less to train our model. We will do image Augmentation to increase our dataset or increase variation in our dataset. In image augmentation we will do flip, rotate, adjust brightness, dihethal shift to images randomly. In Keras we have to do it by oursellf, But in Fastai image data bunch will take care of image augmentation. We need to normalize input as well of imagenet resolution.
ARCHITECTURE
It is very important component of deep learning it define which architecture to use to train and predict on input. Architecture means combination layers one after the other which will be done backside. We just need to choose right layers one after the other. Here in dog vs cat example we will be using transfer learning. In general transfer learning meaning use our understanding (learning) which we have already learnt from other task and use it again in our recent task. Here in our dog vs cat classifier we will be using Resnet 34 model which train on imagenet data set with 1000 classes. We will strip last three layers and add our layers with output using just one.
LOSS FUNCTION
Here will be using binary cross entropy loss function improve our model. Loss function is mainly used to back propagate to improve our model further.
As now we have defined and choose three main component of deep learning we will now assemble all of them to one using Keras and Fastai. First we will use Keras.
KERAS
full notebook is here .
DATA
1) Import tensorflow and fastai dataset to download of dog and cat images
import tensorflow from fastai.datasets import * path=untar_data(URLs.DOGS)
2) Import important libraries as given below.
from tensorflow.keras.applications.resnet50 import ResNet50 from keras.applications.resnet50 import preprocess_input from tensorflow.keras.preprocessing import image #from tensorflow.keras.applications.vgg16 import preprocess_input import numpy as np from tensorflow.keras.layers import Dense, Activation, Flatten,GlobalAveragePooling2D,Dropout from tensorflow.keras.layers import Input from tensorflow.keras.models import Model,Sequential import tensorflow as tf from sys import getsizeof from numpy import random import numpy as np import cv2 import matplotlib.pyplot as plt import os import gzip import pandas as pd
3) Import Keras layers and models to get used in modeling.
DATA GENERATOR
We will be be using Image Data generator to generate image in batches to pass in the model.
4) DEFINE MODEL Here we will use skeleton of Resnet34 which is trained on Imagenet and then added two linear layer with dimensions 1024 and 512 and last layer with 2 dimensions with Softmax.
image_input = Input(shape=(224, 224, 3)) Restnet50 = Sequential() Restnet50.add(ResNet50(include_top=False, pooling='avg', weights='imagenet')) Restnet50.add(Dense(1024, activation='relu')) Restnet50.add(Dense(512, activation='relu')) Restnet50.add(Dense(2, activation='softmax')) # Say not to train first layer (ResNet) model. It is already trained Restnet50.layers[0].trainable = False Restnet50.summary() from tensorflow.python.keras import optimizers Restnet50.compile(optimizer="adam",loss="categorical_crossentropy",metrics=["accuracy"]) Restnet50.summary()
5) Freeze skeleton layer and first only train last layer which you have added on skeleton layers.This will be called fine tune of last layers efficiently.
Restnet50.layers[0].trainable = False Restnet50.summary()
6) Define OPTIMIZER as adam and loss function as categorical_cross entropy and metrics as accuracy. Here OPTIMIZER helps your model to coverage fast and it will take learning rate automatically and loss function is used to decide how much OPTIMIZER have to coverage. Metrics is for us to check hoe much accurate model is and compile model with all hyper parameter which we have defined above.
from tensorflow.python.keras import optimizers Restnet50.compile(optimizer="adam",loss="categorical_crossentropy",metrics=["accuracy"]) Restnet50.summary()
7) Fit model with generator. Train model with data generator we will provide epochs here.
from keras.preprocessing.image import ImageDataGenerator train_datagen = ImageDataGenerator(rescale=1./255, shear_range=0.2, zoom_range=0.2, horizontal_flip=True) test_datagen = ImageDataGenerator() train_generator = train_datagen.flow_from_directory( directory=(path/"train"), target_size=(224, 224), batch_size=64, class_mode="categorical", ) valid_generator = train_datagen.flow_from_directory( directory=(path/"valid"), target_size=(224, 224), batch_size=64, class_mode="categorical", ) test_generator = test_datagen.flow_from_directory( directory=(path/"test"), target_size=(224, 224), batch_size=1, class_mode=None ) filenames = test_generator.filenames nb_samples = len(filenames) Restnet50.fit_generator(generator=train_generator, steps_per_epoch=359, verbose=1, epochs=1, validation_data=valid_generator, validation_steps=31 )
8) Predict :- Then we use predict generator prediction based on test generator and then convert that prediction to classes. WE will have prediction as percentage in each classes.
test_generator.reset() pred=Restnet50.predict_generator(test_generator,steps = nb_samples)
FASTAI
Following steps are used to model FASTAI for classification for dog vs cat. Full Note book is here
Step 1 : Import all important package and module regarding vision package. FASTAI is divide into 4 different package VISION, TABULAR, COLAB FILTERING, TEXT. We will import only required package which are needed in our modeling. which is vision
from fastai import * from fastai.vision import * from fastai.metrics import error_rate,accuracy bs=64
Step 2 : Download datasets from Fastai of dogs and cats from using module untar_data and gives path of pathlib to path and defined batch size to 128 and image size will be set to 224 pixel.
#download Dogs dataset path=untar_data(URLs.DOGS)
Step 3 : Then create Image data lunch which will create data loader and do image Augmentation for us we will take from folder from train folder and from train folder we have two different folder of different label. As in this case we have dog folder which contains all dog image. Folder name act as a label in this we also have valid folder which also contain two folder for dog and cat.
data=ImageDataBunch.from_folder(path=path,test="test1",ds_tfms=get_transforms(),size=size,bs=bs) data.show_batch(rows=3,figsize=(7,6))
As you see in the code we have pass path. ds_tfms which is dataset's transformation, size of image and batch size. We pass path so that Image data bunch look for train folder in that path and automatically convert image and assign it a label. Transformation is used to rotate, flip and data augmentation on fly and batch size is used to divide full datasets into batches.
Then we have show batches function through which we can see random inputs to have feel that everything is ok.
Step 4 : Then we will create learner in FASTAI learner job is to merge all hyper parameter into one and learn some of the hyper parameter such as learning rate using all other hyper parameter such as data, base_arch and metrics. Here loss function is automatically assigns by seeing its input which is binary_cross entropy.
learner=cnn_learner(data,base_arch=models.resnet34,metrics=accuracy)
Step 5 : Use fit_one_cycle to train all layers which are added by learner layer on base architecture here we have taken resnet34 skeleton which is trained on imagenet as a base_arch is freezed by default. Here is the trick that first we have train last layers with input fine tuned it properly then we unfreeze all layers above and then fine turned all.
learner.fit_one_cycle(1)
Step 6 : We will use lr_find to find best learning rate for find training base_arch layers. What lr_find does is. It run random batches on model and changes learning rate incrementally and nats its losses. After finding best learning rate it display graph learning rate vs losses from there we can pick our best learning rate.
learner.lr_find()
Steps 7 : Then we unfreeze all architecture layers including its skeleton. Then fine tune again with the best learning rate which have got from lr_find and fit_one once more to get best learning rate you have see graph and pick two learning rate learner linear learning rate is used to fine tune skeleton layers because we don't want to destroyed already learned weights from imagenet and higher learning rate is use to fine turned later layers
learner.fit_one_cycle(2,max_lr=slice(1e-04,0.004))
Steps 8 : Predict test set using get predicts function passing test dataset.
log_predict, y = learner.get_preds(DatasetType.Test) log_predict
Comparing results of KARAS and FASTAI
Result is received from both frameworks is almost same but the flexibility of performing this experiment is more in fastai then keras because in fastai inbuilt many research proper are implemented but in keras you have to implement by your own. Fastai take less code to implement but more conceptual knowledge in implementing it like knowledge of learning rate revealing and more. While in Keras you nedd a little less knowledge for starting this application.
Errors you can face
1) You haven't important library or you forget to import library. You have face following error.
--------------------------------------------------------------------------- NameError Traceback (most recent call last) <ipython-input-1-1383ea472122> in <module>() ----> 1 path=untar_data(URLs.DOGS)
NameError: name 'untar_data' is not defined
This means you need to import untar_data function
2) Image data Generator needs to have folder inside the path which you have given like has in test! we don't had folder we created folder test/test to copy all file from test! to test/test and pass path "/test" in image data generator for test generator. Now this will work because test folder contains test folder.
3) Input dimension mismatched in Keras you have defined input shape in Keras Architecture model but you are not passing same input shape to architecture then. Architecture will throw error for that.
4) GPU memory exhausted :- This error will uncounted when your computation exceeds GPU memory. Google colab provide 11 GB of memory. If this error occur kindly decrease batch size of data generator.
CONCLUSION
In this post we have introduce hello world of deep learning by using simple dog vs cat example. This simple example contains many concept which possible some of them will be not understand by you. Don't worry we will try to cover all concept in coming post and one advice kindly write fill code from scratch. This will help you in understand concepts. If you find or stuck in any error. Kindly put it command I will be happy to help you.


Leave a Comment
No Comments Yet